Choosing the correct deep-cycle RV battery ensures a reliable travel power source. Whether embarking on a long road trip or simply enjoying a weekend getaway, having a dependable battery can make all the difference. In this guide, we’ll walk you through selecting the best deep-cycle RV battery for your needs so you can enjoy your adventures without worrying about power shortages.
To begin with, it’s important to understand the different types of Deep Cycle Rv Battery available, such as flooded lead-acid, AGM, and lithium-ion, each offering unique benefits. Additionally, consider factors like battery capacity, size, and lifespan to ensure it suits your specific travel requirements.
Understanding Deep Cycle RV Batteries
Deep-cycle RV batteries are engineered to deliver consistent power over long periods, making them ideal for running various appliances and electronics in your recreational vehicle. Unlike starting batteries that provide quick bursts of energy to ignite an engine, deep-cycle batteries discharge their power steadily and can be depleted to a lower charge level without damage. It suits them, particularly for applications with a reliable and sustained power source.
Deep-cycle batteries can be categorised into different types, including flooded lead-acid, AGM (Absorbed Glass Mat), and lithium-ion batteries. Flooded lead-acid batteries are traditional, affordable, durable, and require regular maintenance.
AGM batteries are sealed, maintenance-free, and vibration-resistant, making them popular for RV users. Lithium-ion batteries, while more expensive, offer a longer lifespan and lighter weight, providing high performance with minimal maintenance. Understanding these differences can help you choose the most suitable battery type for your specific needs and usage patterns.
Types of Deep Cycle RV Batteries
Deep-cycle RV batteries come in various types, each with unique characteristics and benefits. Flooded lead-acid batteries are the most traditional option, offering affordability and durability. However, they require regular maintenance, such as topping up with distilled water and ensuring proper ventilation.
- AGM (Absorbed Glass Mat) batteries are a popular choice due to their maintenance-free design and resistance to vibrations, making them suitable for the often bumpy conditions experienced during RV travel. These batteries are sealed, eliminating the risk of acid spills and reducing the need for ventilation.
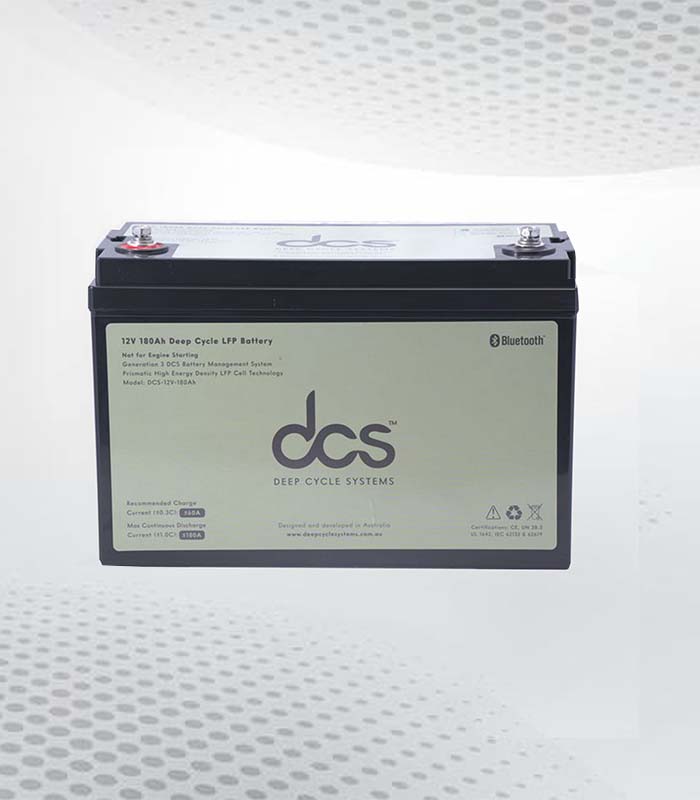
- Lithium-ion batteries represent the high-end option, providing a longer lifespan and a significantly lighter weight than their lead-acid counterparts. They also boast faster charging times and higher efficiency, though they come at a premium price. Each battery type has pros and cons, and your choice will largely depend on your budget, maintenance preference, and specific power requirements. Understanding the distinctions between these battery types allows you to make a more informed decision that aligns with your RV lifestyle.
Determining Your Power Needs
To accurately determine your power needs, list all the appliances and electronics you plan to use in your RV. This may include lights, refrigerators, air conditioners, fans, laptops, and mobile devices. Each device typically has a power rating, usually indicated in watts or amps, which you can find on the appliance label or in the user manual.
Next, estimate the duration each device will be used daily. Multiply the power rating by the hours you expect to use each item to calculate the total watt-hours or amp-hours needed. For instance, if you plan to use a 50-watt light bulb for 4 hours a day, it will consume 200 watt-hours of power (50 watts x 4 hours). Repeat this calculation for all your devices and add the totals to estimate your daily power consumption comprehensively.
Consider the length of your trips and whether you have access to recharging facilities. If you frequently camp off-grid, you may require a battery with a higher capacity to ensure you have enough power until you can recharge. It’s also wise to factor in a buffer for unforeseen power usage, ensuring you won’t be stranded without energy. This thorough approach will help you select a deep-cycle RV battery that effectively matches your specific power needs.
Factors to Consider When Buying the Best RV Deep Cycle Battery
Several key factors should be considered when selecting the best RV deep-cycle battery. Firstly, assess the battery’s capacity, measured in amp-hours (Ah), to ensure it meets your energy requirements. A higher capacity means more stored energy and longer runtime.
Next, consider the Best Rv Deep Cycle Battery cycle life, which indicates how many charge and discharge cycles it can endure before its capacity diminishes. Opt for a battery with a high cycle life for better longevity.
Weight and size are also crucial, as these will affect the ease of installation and the overall weight of your RV. Ensure the battery fits within the designated storage space without compromising other components.
Another important aspect is temperature tolerance. Some batteries perform better in extreme temperatures, which can be beneficial if you travel in varied climates.
Look at the battery’s discharge rate to understand how it delivers power under different loads. A consistent and steady discharge rate is ideal for maintaining the performance of your RV appliances.
Lastly, factor in the cost of the battery itself and any potential maintenance and replacement expenses. Balancing your budget with your specific needs will help you choose the most cost-effective and reliable option.
Installing Your Deep-Cycle RV Battery
Properly installing your deep-cycle RV battery is essential for ensuring efficiency and safety. Begin by choosing a well-ventilated area within your RV to avoid the buildup of gases. Use a suitable battery box to secure the battery and protect it from vibrations and impacts during travel. Carefully follow the polarity markings when connecting the battery terminals, ensuring the positive and negative terminals match the respective cables correctly. Tighten all connections to prevent any loose contacts, which could lead to inefficiencies or short circuits.
Apply a thin layer of petroleum jelly or a specialised terminal protector to the battery terminals to prevent corrosion. Double-check all connections and mounts for stability. If your battery requires venting, make sure the venting system is correctly installed to channel gases outside the RV. When integrating multiple batteries, use appropriate cables and connections to maintain balance and efficiency.
After installation, conduct an initial test to verify that the battery and your RV’s electrical system are functioning correctly. If there are any signs of irregular performance, recheck all connections and consult the manufacturer’s guidelines.
Maintenance and Care of the Marine Rv Deep Cycle Battery
Regular maintenance is critical to prolonging the lifespan and ensuring the optimal performance of your marine RV deep-cycle battery. For flooded lead-acid batteries, check the electrolyte levels periodically and top up with distilled water as needed. It’s essential to keep the battery terminals clean and free from corrosion, which can be done using a solution of baking soda and water. Applying a terminal protector can further prevent corrosion.
Ensure that the battery is kept at an appropriate state of charge. Deeply discharging the Marine Rv Deep Cycle Battery frequently can reduce its overall lifespan. Use a high-quality charger designed for deep-cycle batteries to maintain a consistent charge.
The maintenance requirements for AGM and lithium-ion batteries are generally lower. However, it’s still important to keep them clean and ensure all connections are secure. Periodically check for any signs of damage or wear and replace any cables or terminals that appear compromised.
If you store the battery for an extended period, keep it in a cool, dry place and maintain a charge of around 50-75%. Avoid storing it in extreme temperatures, which can negatively impact its health. Regularly monitoring and caring for your battery will help you avoid unexpected power issues during your travels.
Troubleshooting Common Issues
Identifying and resolving battery issues promptly can prevent interruptions during your travels. Start by checking for loose or corroded connections, common culprits behind poor battery performance. Clean the terminals with baking soda and water, and ensure all connections are tight. If your battery is not charged, it may be due to deep discharge cycles or an underperforming charger.
Verify that you are using a charger designed for deep-cycle batteries and that it is functioning correctly. For batteries that discharge rapidly, inspect for any parasitic loads, such as devices left on inadvertently, that could be draining the battery.
A multimeter tests the battery voltage and compares it against the manufacturer’s specifications. Low voltage readings may indicate a failing battery that needs replacement. Regular monitoring and timely maintenance can mitigate these common issues and keep your battery in optimal condition.
Upgrading and Replacing Your 12v Deep Cycle RV Battery
Preparation and knowledge are essential when it’s time to upgrade or replace your 12v Deep Cycle Rv Battery. Start by assessing your current battery setup and identifying any performance issues you have experienced. This will help you choose a new battery that better suits your needs. When selecting a replacement, consider whether you want to stick with the same type of battery or upgrade to a different technology, such as moving from a flooded lead-acid battery to an AGM or lithium-ion option.
Before removing the old battery:
- Ensure your RV is turned off and disconnected from any power sources to prevent accidental shorts or shocks.
- Carefully disconnect the battery cables, starting with the negative terminal, to avoid sparking.
- Remove the old battery and inspect the battery compartment for any signs of corrosion or damage.
- Clean the compartment and terminals thoroughly before installing the new battery.
Place the new battery into the compartment, securing it with a suitable battery box or mounting system to protect it from movement and vibrations. Connect the cables to the new battery, beginning with the positive terminal. Ensure all connections are tight and secure. Double-check the polarity to prevent any damage to your RV’s electrical system.
Once installed, charge the battery according to the manufacturer’s instructions to ensure optimal performance from the outset. Then, monitor its performance regularly to ensure it meets your expectations.
Safe Practices for Using RV Deep Cycle Batteries
Always handle deep-cycle RV batteries with care to avoid accidents. Use insulated tools to prevent short circuits and keep flammable materials from the battery area. When installing or removing a battery, ensure your RV’s electrical system is turned off to avoid electrical shocks. Be mindful of the battery’s weight and lift it using proper techniques to prevent injury.
When connecting or disconnecting cables, always start with the negative terminal to reduce the risk of sparking. Regularly inspect the battery for any signs of leaks, bulges, or damage, and address these issues immediately to prevent hazardous situations. If a battery leak occurs, neutralise the spill with a baking soda solution and clean the area thoroughly.
Ensure the battery is securely mounted to minimise movement during travel, which can lead to disconnections or damage. If the battery type requires it, use appropriate ventilation to disperse any gases safely. When disposing of old batteries, follow local regulations to ensure they are recycled properly, as improper disposal can be harmful to the environment. By adhering to these safety practices, you can maintain a safe and efficient power system in your RV.
Ensuring Optimal 12 Volt Deep Cycle RV Battery Performance
To ensure optimal performance from your 12 Volt Deep Cycle Rv Battery, it is essential to adopt a few best practices. Regularly monitor the battery’s charge level and avoid deep discharges, as these can significantly shorten its lifespan. Utilise a quality battery charger specifically designed for deep-cycle batteries, and charge the battery slowly to maintain its health.
Ensure your battery connections are tight and corrosion-free, as poor connections can lead to inefficiencies and power loss. Periodically equalise your flooded lead-acid battery to balance the charge across all cells, which helps in maintaining its capacity and longevity. For AGM and lithium-ion batteries, ensure they are stored at an appropriate temperature and kept clean.
Employ a battery monitor system to monitor voltage and usage, providing real-time data on your battery’s status. Lastly, avoid overloading the battery with too many devices at once, as this can lead to excessive wear and reduced performance. Following these steps will help you get the most out of your 12-volt deep-cycle RV battery, ensuring reliable power during your travels.
Conclusion
Selecting the correct deep-cycle RV battery ensures a reliable power source for your adventures. By understanding the different battery types and assessing your power needs, you can make an informed decision that fits your travel lifestyle. Regular maintenance and proper installation are crucial to extending your battery’s lifespan and performance. Follow safety practices to avoid accidents and ensure your RV remains powered efficiently. Investing time and effort into choosing and caring for your deep cycle battery will pay off in uninterrupted, enjoyable journeys.
FAQs
Q: What is the difference between deep-cycle RV and starting batteries?
A: Deep-cycle RV batteries are designed to deliver steady power over a long period, which is ideal for running appliances and electronics in your RV. In contrast, starting batteries provide a quick burst of energy needed to start an engine.
Q: How often should I maintain my Marine Rv Deep Cycle Battery?
A: The frequency of maintenance depends on the battery type. Flooded lead-acid batteries require regular checks for electrolyte levels and terminal cleaning. In contrast, AGM and lithium-ion batteries are generally maintenance-free but should be inspected periodically for cleanliness and secure connections.
Q: Can I use a regular car battery charger for my 12v Deep Cycle Rv Battery?
A: No. It is recommended to use a charger specifically designed for deep-cycle batteries to ensure proper charging and to avoid potential damage.
Q: How can I extend the lifespan of my deep-cycle RV battery?
A: Avoid deep discharges, use a quality charger, ensure connections are clean and tight, and perform regular maintenance checks. For flooded lead-acid batteries, periodic equalisation helps maintain capacity and longevity.
Q: What should I do if my deep cycle RV battery isn’t holding a charge?
A: Check for loose or corroded connections, ensure you’re using the correct charger, and test the battery voltage. If issues persist, it may be time for a replacement.
| Related Business Listings |
| Directory Submissions |
| Regional Directory |